
So one day, I was looking for some very wide screenshots of Skyrim to use as desktop wallpapers for my dual monitors. But I wasn’t terribly pleased with what was already out there; most of which were 16:9 aspect ratio instead of the 25:10 that I needed. So I decided to use my experience with photo panoramas to create my own Skyrim panoramas that could be any aspect ratio that I wanted.
You can use the following panoramas for whatever you like or create your own. These panoramas were created at Ultra settings (except Medium Shadows) during regular gameplay. They also feature the mods High Resolution Texture Pack, Climates of Tamriel, and Realistic Water Two.
Ancestor Glade

Castle Volkhir

College of Winterhold

Forest Bridge

Fort Dawnguard

Fort Sunguard

Hall of Valor

Lake Honrich

Markarth (Day)

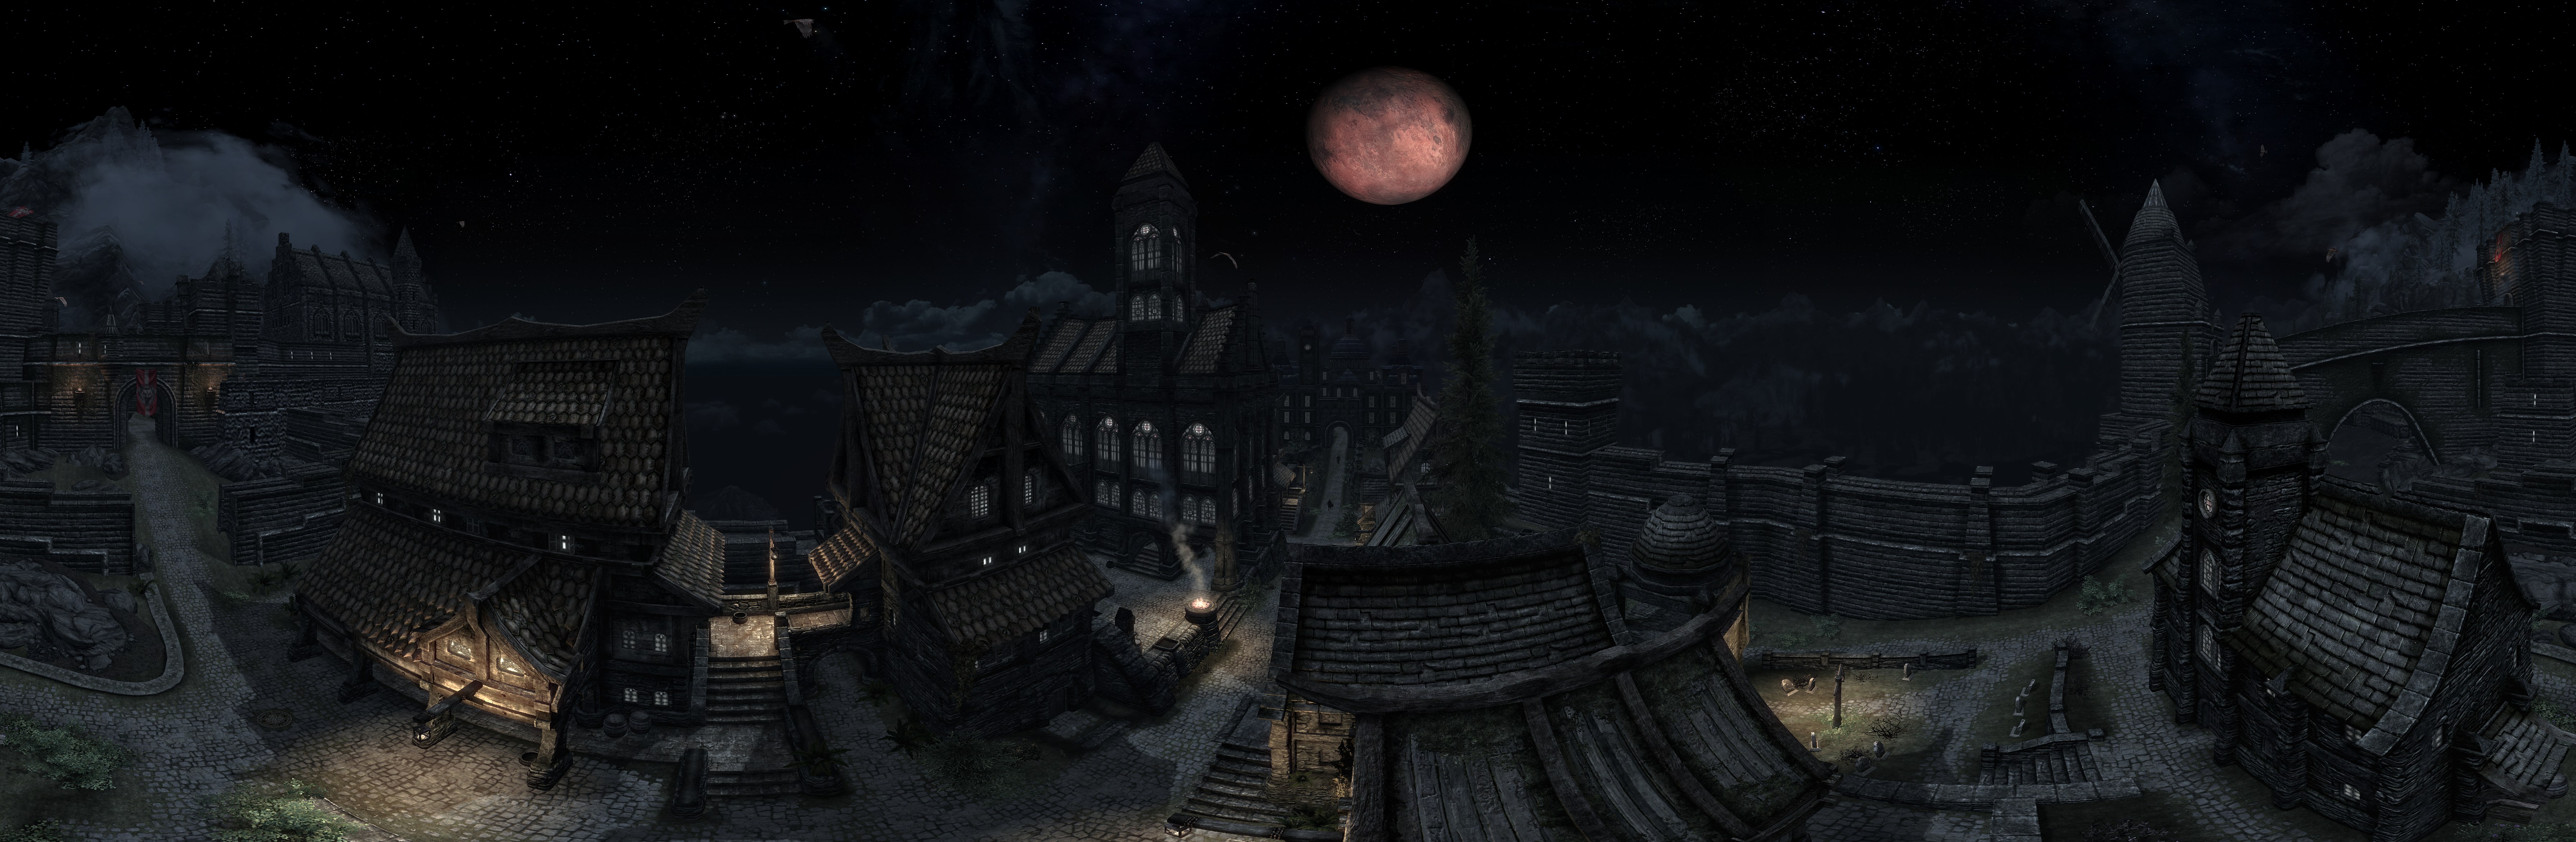
Markarth Night

Mzulft

Rebel’s Cairn

Riften

Skuldafn

Solitude (Day)


Solitude (Night)
Sovngarde (Dark)

Sovngarde (Light)

Talking Stone Camp

Whiterun (Night)

Windhelm

Yngvild

How To: Make Your Own Skyrim Panoramas
- While in an area where you want to create a panorama, open the console by pressing the tilde (`) key.
- Enter
tfc 1into the console. This will pause the world and toggle free cam, which lets you move independent of your player character. - Enter
tminto the console. This will toggle the hud, which you certainly don’t want in your screenshots. - Now you’ll need to take the screenshots that will make up your paronama, one shot at a time.
- To take a screenshot, use the Printscreen key. (Don’t use Steam’s screenshot feature as it creates lossy images.)
- After you take each shot, pan the camera to a new angle, making sure to overlap your previous shot by about 20%.
- This process works best if you go about it systematically. Try starting your captures level with the horizon, panning horizontally first and then vertically. If you’re doing a 360° panorama, start your captures at a specific landmark so you know when you’ve completed your horizontal pans. And finally, never change your location in the middle of shooting a panorama.
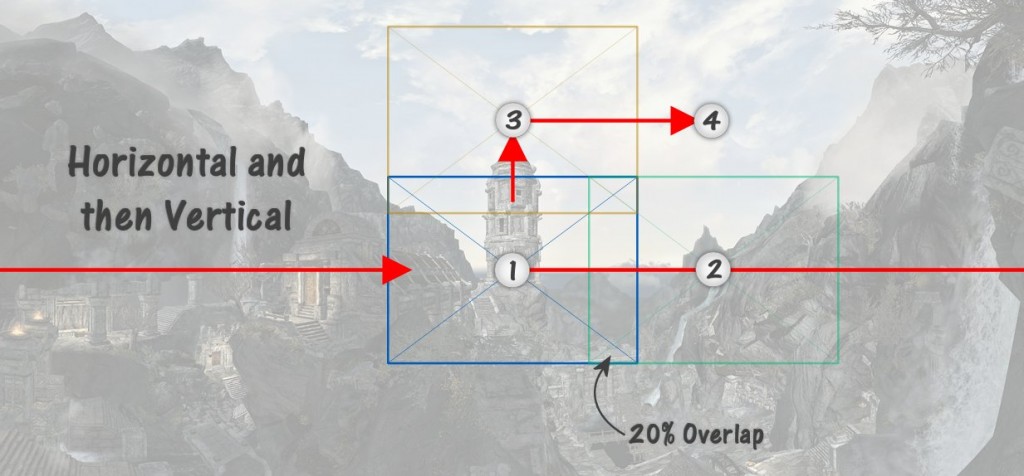
Panorama Tutorial
- You’ll find your screenshots in the Skyrim install directory. You should organize the image files into batches representing each panorama. Looking at the modification time or thumbnails can be helpful for separating batches.
- Download an image stitching app. I recommend Microsoft’s Image Compositing Editor —it’s free, simple, and has good accuracy.
- In ICE, open a batch of images, and the program will automatically stitch them together and show you a preview. Simply crop the panorama to the aspect ratio of your choice and save.


You sir are a hero.
Thank you, kind sir.